Selecting the right commercial fence is a crucial decision, requiring a balance of safety, style, and budget. An effective fence enhances property appeal while controlling access. Key considerations include purpose, required security level, design cohesion, future needs, and maintenance implications.
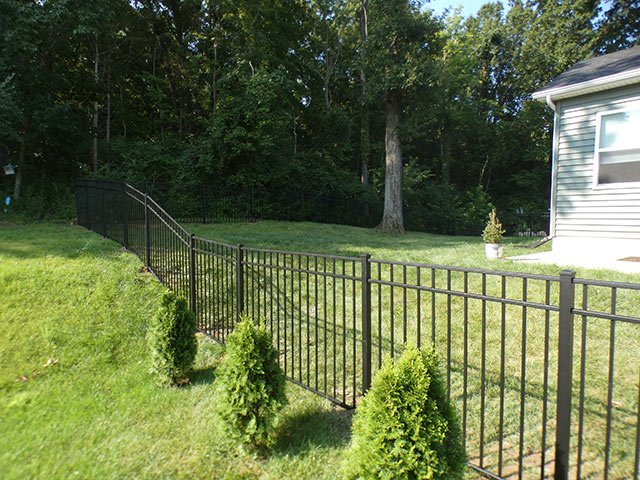
Wood usually costs less to put in, and metal costs less to keep. Installed aluminum runs $20 to $45 a foot around St. Louis, and most jobs land between $25 and $40. Wood needs stain every two or three years, plus new boards as old ones rot. A picket metal fence needs neither. You can see straight through it, though, so it gives you no privacy.
Aluminum fence cost in St. Louis averages $5,086, according to Angi, and most homeowners pay $3,184 to $7,211. On a per-foot basis, Yelp’s analysis of 534 quotes puts an installed 4-foot fence at $15 to $45 per linear foot. Your own total depends on the footage, the height, the gates, any old fence to remove and the ground.
If you want to keep your little corner of St. Louis secure while boosting your home’s value, a SimTek fence is worth taking a look. SimTek fence has the look and feel of a real granite wall, but has the easy installation and maintenance-free beauty of wood-free fencing.
SimTek brand fencing is made from polyethylene, which is the same type of plastic used to make Little Tikes™ playground equipment. This material has several key advantages:Read More
“Bigger is better” is a mantra many St. Louis homeowners live by. But when it comes to fencing, sometimes it’s better to step back and look at different fence height regulations. You may discover those extra feet aren’t worth the trouble! Read More
Important Information for Your next Fencing Project
Drive around any neighborhood and you will see wood fencing everywhere. This is clearly a popular fencing option, but does that mean it’s the best fencing option, or the right one for your next fencing project? Learn about the pros and cons of wood fencing and decide for yourself. Read More
If you love to “do it yourself” affordable vinyl fences are a great option. Compared to alternative fencing options, namely stone and wood, low-cost fences made of vinyl or some other type of maintenance-free material simply work better in home and business improvement projects. If you are about to start your own fencing project here are a few reasons you should strongly consider affordable vinyl fences. Read More
This is a common question and one that many people are confused by. Because while most people have an idea of what maintenance-free fencing is, they don’t realize how truly varied and versatile it can be. In order to answer all your questions about this exciting home and business improvement option, we have put together this simple guide. Read More
HOA fence approval in St. Louis County often means getting written permission from your subdivision trustees before you order a fence or dig a post hole. The short answer: get their approval first, because it is separate from any city permit. Ask for the trustees’ answer in writing before you spend money on materials.
Plastic fencing is any fence made from plastic instead of wood or metal, and it comes in two very different kinds: rigid vinyl panels made of PVC, built as a permanent fence, and flexible plastic mesh sold in rolls for gardens and short-term use. Vinyl is the kind that lasts 20 to 30 years as a yard fence. Around St. Louis it runs about $45 to $75 a foot installed.
A land survey for fence installation is a licensed surveyor’s measurement of where your property lines run, marked on the ground so the fence goes on your side of them. Angi’s St. Louis figures run from about $500 for a small lot to $3,200 for a fence-land survey, and a recent survey you already own can sometimes do the job.
The white-picket fence symbolizes the suburban, small town ideal, where 2.5 kids catch lightning bugs on hot summer nights, a Golden Retriever runs after balls in the backyard, and BBQs are held every weekend.But what we don’t picture are the problems that come with wood fencing materials. That white-picket fence is bound to split and crack, rot causing the posts to lean, and mom and dad spend what should be lazy summer days on painting and repairs. Read More
It’s summer in St. Louis. The smell of fresh cut grass and backyard barbecue linger in the air, and the sound of Cardinals baseball drifts through the open windows. It doesn’t get any better than this. Unless, of course, you’ve got a backyard man cave. Read More
Aluminum wins for almost every yard. Chain link installed runs $10 to $40 a foot depending on height, and aluminum runs $20 to $45 a foot in St. Louis, usually $25 to $40. The gap is smaller than you might expect, and aluminum never rusts, never needs paint, and clears most HOA rules that chain link fails.
An invisible fence costs about $1,600 to have installed around St. Louis. Most homeowners pay $950 to $2,500, based on Angi’s local cost figures updated in July 2026. The system is a buried wire or wireless signal, plus a collar that beeps, then corrects, at the line. A real aluminum fence usually runs $3,750 to $6,000 for a 150-foot backyard line. That is about 2 to 4 times as much. It also keeps other animals out, not just your dog in.
A vinyl fence costs more up front than a wood fence and less over 20 years, because nothing about it ever needs painting. That is the short answer. This guide covers the styles, what each one costs in St. Louis, how long it lasts here, and when vinyl is the wrong choice.
Want it measured for your yard? See how our vinyl fence installation works, or call Maintenance-Free Outdoor Solutions at 636-464-1144 for a free on-site estimate. The vinyl we install is the Catalyst range from Barrette Outdoor Living, sold for years as Bufftech by CertainTeed, and we are listed on their installer directory.
Maintenance-Free Outdoor Solutions has been installing fences in St. Louis since 1994, which you can check on our BBB business profile. I have spent those years helping owners pick a fence that still makes sense in twenty years. Most people come to me after warped wood, endless staining, an HOA letter, or a fence that did not survive a few Midwest winters.
In this region, the “right” fence isn’t just about look. Between freeze-thaw cycles, heavy storms, and strict neighborhood guidelines, long-term performance matters just as much as curb appeal. Vinyl fencing often enters the conversation when owners want fewer maintenance headaches and more predictable wear.
Vinyl fencing is a long-term fencing solution that performs well in St. Louis weather, requires minimal upkeep, and keeps the same look for decades. While it usually costs more upfront than wood, many owners choose it for how long it lasts and what it saves later.
Key Takeaways
Choose in this order:
Decide what the fence has to do: privacy, a boundary, or a pool code.
Pick the height, then check whether your city or subdivision has to approve it. See the styles and what it costs.
Pick the style, then ask what the panel wall thickness is.
Get the post depth right. It is 30 to 36 inches here, which the install section explains, and plan the upkeep, which is a hose.
Vinyl holds up through St. Louis freeze-thaw, humidity and wind without rotting, warping or peeling.
It costs more than wood on day one and less over twenty years, because it never needs paint or stain.
It washes with a hose. That is the whole upkeep list.
Vinyl Fence Styles and Design Options
One of the reasons owners are drawn to vinyl fence styles is the flexibility they offer when it comes to look. Today’s vinyl fencing suits a brick house in the city and a new build in St. Louis suburbs with strict HOA guidelines.
It comes in several colors, and in woodgrain finishes that look like stained wood with none of the work.
The styles run from plain straight-top panels to scalloped and lattice tops, so the fence can match the house without costing you strength.
Privacy, Picket, and Specialty Vinyl Fences
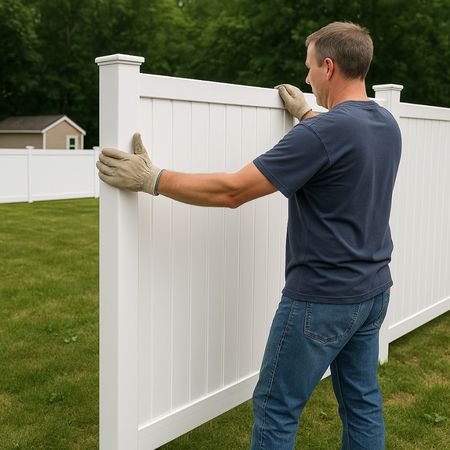
Which style makes sense depends on how you use the yard. Privacy panels are usually 6 feet tall and 6 feet wide. Spaced picket usually runs 4 feet. A vinyl privacy fence is one of the most common choices in St. Louis because it creates a clean, enclosed space using solid privacy panels that block sightlines from neighbors, streets, or alleyways.
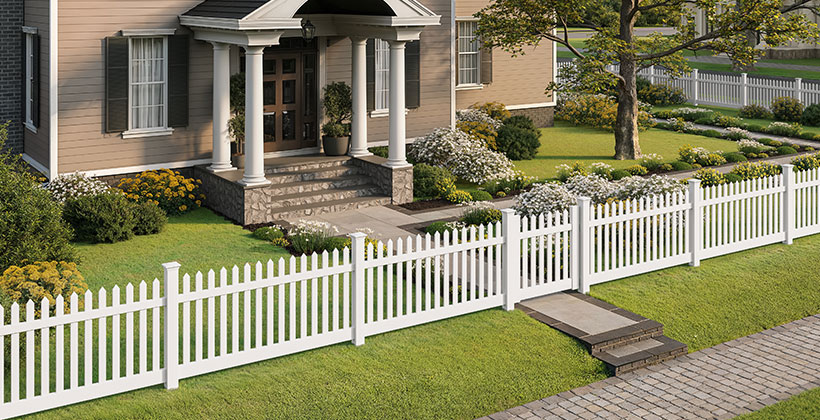
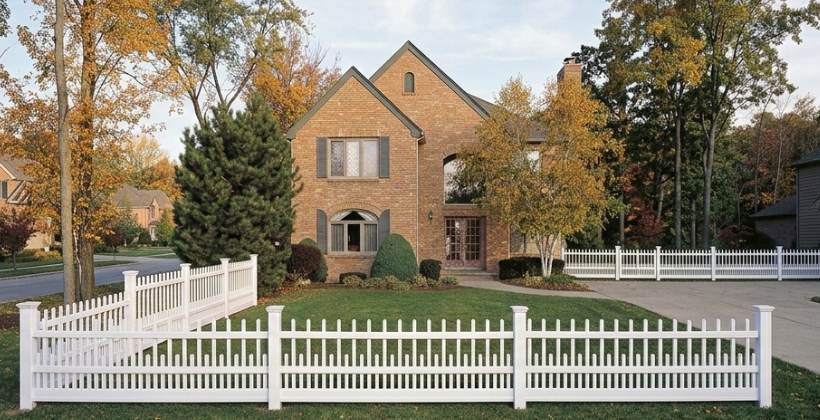
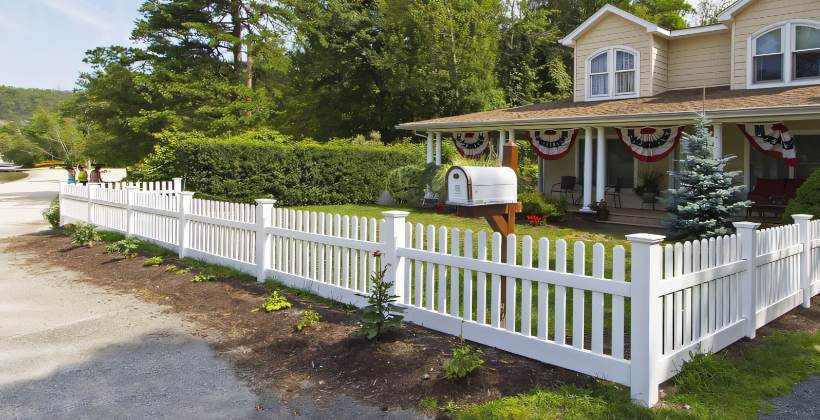
For front yards and decorative boundaries, picket fences remain a timeless option. Vinyl picket styles work especially well for owners who want definition without closing off their property.
On larger lots or rural edges, ranch rail vinyl fencing provides structure without visual heaviness. For safety-focused installations, a vinyl pool fence is built to meet pool code, and it still lets you watch the water.
Vinyl Fence Height and Property Line Considerations
Before any fence goes in the ground, fence height and placement are two of the most important details to get right. Local codes and HOA rules set most of this. So does how close the fence sits to the line. Getting this wrong can lead to fines, forced changes, or disputes that could have been avoided.
Most cities and HOAs set height limits for front, side and back yards. Some also want the fence set back from the line.
Confirm the survey and the local rules first. It is cheaper than moving a fence later, and it keeps the neighbors out of it.
Why Calling 811 Before You Dig Matters
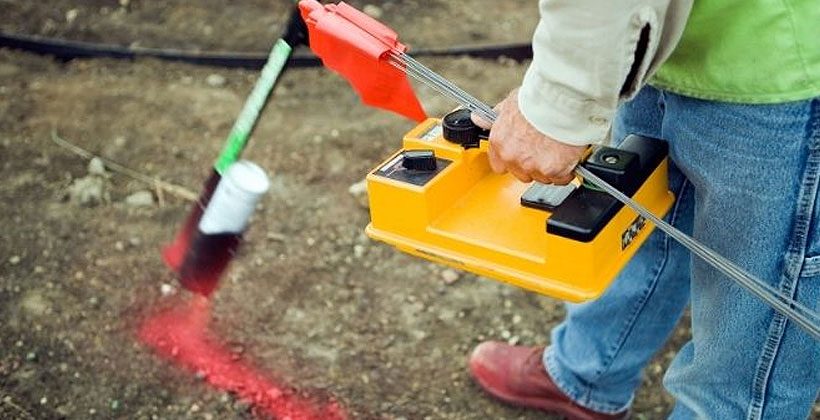
Before any vinyl fence installation begins, you should contact 811 before you dig. Fence posts require digging, and buried utility lines may be much closer to the surface than owners expect. Hitting a gas, electric, water, cable, or communication line can lead to dangerous injuries, service outages, expensive repairs, project delays, and possible fines. Call 811 before any digging. They mark the buried lines, it is free, and it is the law.
In other words, calling 811 is not just a smart precaution. It is one of the most important first steps in planning a fence project safely
The numbers a fence company will ask you for:
Height. 4, 5 or 6 feet. Privacy is usually 6 feet, picket is usually 4.
Panel width. 6 feet is standard, and some styles run 8. Posts sit 6 to 8 feet apart to match.
Post depth. 30 to 36 inches here. Gates need a bigger hole than the rest of the run.
Footage. Walk the line and measure it. The six jobs below ran from 61 to 531 linear feet.
Vinyl Fencing Performance in St. Louis Weather
St. Louis weather is hard on fences, plain and simple. Between freezing winters, heavy spring rains, summer heat, and strong storm systems, materials are constantly expanding, contracting, and taking abuse. From what I’ve seen on installs across the metro area, vinyl handles those conditions better than most.
Because vinyl doesn’t absorb moisture, it isn’t vulnerable to rot, swelling, or splitting during freeze-thaw cycles. It also holds up well in high winds and seasonal storms when properly installed.
That stability is why a vinyl fence still looks square years later.
Vinyl Fence Upkeep
One of the questions I hear most often is how much work a vinyl fence really requires after it’s installed. Compared to wood or metal options, vinyl has very simple upkeep. There’s no need for painting, staining, or sealing, just occasional cleaning to remove dirt or pollen.
Another major advantage is that vinyl isn’t affected by insect damage. Termites, carpenter ants, and other pests that commonly cause problems for wood fences simply aren’t an issue with vinyl.
For anyone who wants a fence that stays solid without constant upkeep, that difference is the whole argument.
Common Vinyl Fence Problems
While vinyl fencing offers strong long-term performance, it’s not without limitations. Most complaints come down to price, thin panels or a rushed install, not the vinyl itself.
Higher upfront cost: vinyl costs more than basic wood to buy, which matters when you are fencing a whole yard at once.
Quality differences: Lower-grade vinyl may discolor faster, become brittle, or fail at connection points, especially in climates with seasonal temperature swings.
Installation issues: most vinyl failures trace to shallow holes and rushed layout, not the panel.
Vinyl Fence Cost Overview
Vinyl costs more than wood on day one and less over twenty years, because it never needs paint or stain. Height, style, gate count and ground conditions all move the number, so there is no single price.
Wood reacts to Missouri weather. It takes on water, dries out, and moves with every season, so it needs staining and board replacement. Vinyl does not. The table shows where each one lands.
Vinyl vs Wood Fencing in Missouri Climate
Feature
Vinyl Fencing
Wood Fencing
Climate response
Stays stable through humidity and temperature swings.
Expands, contracts, and absorbs moisture more easily.
Maintenance needs
Typically needs occasional cleaning.
Often needs staining/sealing and periodic repairs.
Insect resistance
Not affected by termites or carpenter ants.
Can be vulnerable to insect damage over time.
Appearance over time
Maintains a consistent look with minimal change.
Can warp, fade, crack, or rot depending on upkeep and exposure.
Long-term ownership
More predictable performance with fewer upkeep demands.
Ongoing maintenance is usually required to keep it looking and performing well.
Mobile tip: Swipe left/right to view the full table.
Vinyl vs Aluminum Fencing
Neither rusts. The choice is what you want to see. Vinyl closes the yard in, aluminum leaves the view open and meets pool code. The table lays them side by side.
Vinyl vs Aluminum Fencing: Choosing the Right Fit
Feature
Vinyl Fencing
Aluminum Fencing
Privacy
Privacy styles available for full yard enclosure.
Open design; provides visibility rather than privacy.
Appearance
Solid, uniform panels and consistent lines.
Decorative, lightweight look with open pickets.
Noise reduction
Can reduce some outside noise due to solid panels.
Front yards, decorative boundaries, visibility-focused areas.
Visual consistency
Enclosed look that helps define the space.
Open look that preserves sightlines and views.
Mobile tip: Swipe left/right to view the full table.
Vinyl Fence Installation Overview
Posts go 30 to 36 inches deep here, set in concrete over a gravel base, because that is what the local frost line asks for. Gates need a bigger hole than the rest of the run, because they swing.
Even the best materials can fall short if the work isn’t done right. I’ve seen fences made from high-quality products fail simply because corners were cut during installation. A fence built with high-quality vinyl still depends on precise post depth, correct spacing, and clean connections to perform as intended.
Set right, the fence stays straight through wind and temperature swings for years. Just as important, correct installation protects manufacturer warranties.
Craftsmanship is what turns good materials into a fence that truly lasts.
Can You Paint a Vinyl Fence?
Technically, yes. But I rarely recommend it.
Vinyl fencing is manufactured with color mixed all the way through the material, not just on the surface. That’s exactly why it never needs painting in the first place. If you paint over it, you’re adding a maintenance task back onto a product that was designed to eliminate one.
Standard latex or oil-based paints don’t bond well to PVC’s slick surface. Most DIY paint jobs start peeling, chipping, or flaking within a season or two, especially through a St. Louis summer of direct sun and humidity.
If you are set on changing the color, use a paint made to bond to vinyl or PVC siding. Test it on a hidden section first.
In most cases, though, it’s more cost-effective and longer-lasting to replace the panels with vinyl fencing manufactured in the color you actually want. Bufftech and CertainTeed both offer several standard colors we can match to your existing posts.
How Do You Repair a Damaged Vinyl Fence Panel?
Vinyl repair means replacing the damaged piece, not patching it. PVC does not fill the way wood does.
Our systems use separate rails and pickets that snap or screw into the posts, so one damaged picket is one picket, not a whole panel. Write down the maker and the style when the fence goes in. An exact match is easy to order in five years. Guessing at a color is not.
If more than two sections are damaged, or a post has shifted, get someone out to look at the posts before you order parts.
Who Vinyl Fencing Is Best For
Vinyl fencing is a popular choice for owners who want a long-term solution with little ongoing work and a look that stays the same. It suits people who want a fence that lasts and behaves predictably, and who would rather not spend weekends on it.
Long-term owners who plan to stay in their home for years and want a fence that looks the same season after season
Busy families and professionals who don’t want to spend weekends painting, staining, or repairing a fence
HOA-regulated neighborhoods where uniform look and consistency matter
Owners prioritizing peace of mind over short-term savings or frequent upkeep
When Vinyl Fencing May Not Be Ideal
Vinyl is not for you in four cases.
The lowest possible price on day one is the goal. Vinyl is not the cheapest fence to buy.
The fence is temporary, for a build or a short stay.
The run takes real force: equipment, livestock or a commercial yard. A vinyl panel will not take a hit from a mower deck the way steel does.
Looks do not matter at all and the fence is pure function.
Six vinyl fences we installed around St. Louis. Each one has its own page with photographs and the numbers.
Bryant, Wildwood, 31 August 2026. 6-foot Supreme privacy replacing a 4-foot fence after a pool went in. The city approved the height first, because the line runs along a main road.
Harvengt, Collinsville, 1 May 2026. Artic Blend woodgrain privacy, 84 linear feet, set in sections around a patio rather than around the whole yard.
Rogers, St. Louis, 25 June 2026. 6-foot white privacy, 61 linear feet, replacing wood on a city lot.
Emht, Imperial, 29 July 2026. 4-foot white spaced picket, 160 linear feet, chosen to hold dogs and still see the yard.
Weis, Fenton, 13 August 2026. 4-foot white picket, 131 linear feet, on a corner lot. The drive gate had to hang on a slope, and we found roots where two large trees had just come out.
Sumner, Barnhart, 5 June 2026. White 3-rail split rail, 531 linear feet, the longest vinyl run we have done.
Two things show up on nearly every St. Louis job. Your city or subdivision may have to approve the height or the style before anything is ordered, and the ground decides the schedule. Rock, roots and slope cost more time than extra footage.
Warranty Coverage and Long-Term Protection
Many vinyl fencing products come with a lifetime warranty, but it’s important to understand what that actually covers. A warranty covers defects in the material. It does not cover a bad install, misuse or ground movement.
From my experience, a warranty is only as valuable as the quality of the product and the way it’s installed. When owners choose reputable manufacturers and professional installation, that warranty becomes meaningful long-term protection rather than just marketing language. Knowing what’s covered, and what isn’t, helps set realistic expectations and avoids surprises years down the road.
Frequently Asked Questions About Vinyl Fencing
How long does a vinyl fence last?
With quality panels and posts set to depth, a vinyl fence lasts decades with very little change in how it looks.
Does vinyl fencing fade or discolor?
Good vinyl is made with UV inhibitors, so it holds its color far better than wood that has to be stained.
Is vinyl fencing HOA-friendly?
In many St. Louis suburbs vinyl is approved, because the look stays the same. Check your own rules first, and expect the height and style to need approval.
Can vinyl fencing handle Midwest weather?
Yes. It holds up through freeze-thaw, humidity and storms when the posts are set to depth in concrete.
Is vinyl fencing hard to maintain?
No. Wash it with a hose once or twice a year. There is no painting, staining or board replacement.
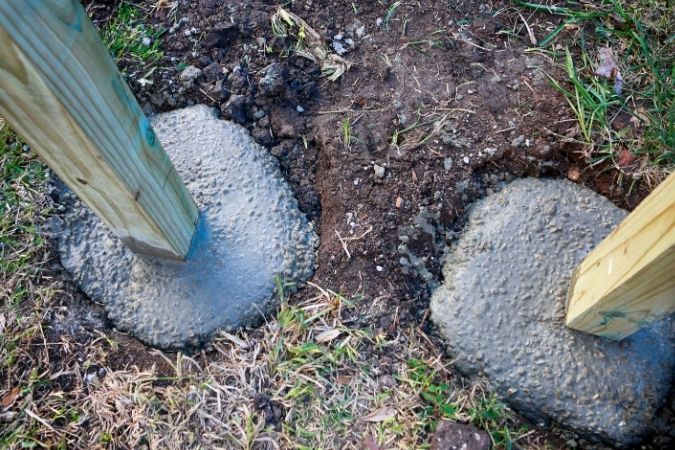
Vinyl fence posts go 30 to 36 inches deep in the St. Louis area, set in concrete over a 3 to 6 inch gravel base. The depth follows your local frost line, which averages about 30 inches here. Gate posts go deeper and wider than line posts, because they carry a swinging load every day.
That one measurement is what most vinyl fence installations get wrong, and it is why a fence leans within a few years instead of staying straight for decades. Too shallow and frost heave lifts the post. Everything else on this page assumes you got the holes right first.
The holes decide the fence. Get the depth and the spacing right and a vinyl fence stays straight for decades. Get them wrong and no amount of care with the panels saves it.
We have been putting vinyl fence in the ground around St. Louis since 1994. This page is the order I work in, the same order as the six jobs below: layout, slope, holes, posts, panels, cleanup. The six jobs further down are real ones, with the footage, the gates and the days each took.
Plan ahead: Mark your fence layout, consult with neighbors, and obtain permits before digging.
Evaluate your terrain: Identify slope and choose between racked or stepped fence installation.
Dig correctly: Fence post holes should be 30″–36″ deep with a gravel base for drainage and frost protection.
Reinforce gate posts: By using deeper, wider holes with added supports, such as rebar or pipe inserts.
Set posts precisely: Use levels and string lines before pouring concrete to ensure plumb, aligned posts.
Cut panels cleanly: Use proper tools and safety gear when trimming panels to fit slopes or tight spaces.
Finish strong: Backfill, install post caps, check alignment, and clean up the site for a polished result.
How Many Fence Panels Do I Need?
How to Install a Vinyl Fence: Step by Step
Six steps, in the order I do them on a job:
Mark the fence layout.
Check the slope.
Dig the post holes, deeper and wider for gates.
Set the posts in concrete over gravel.
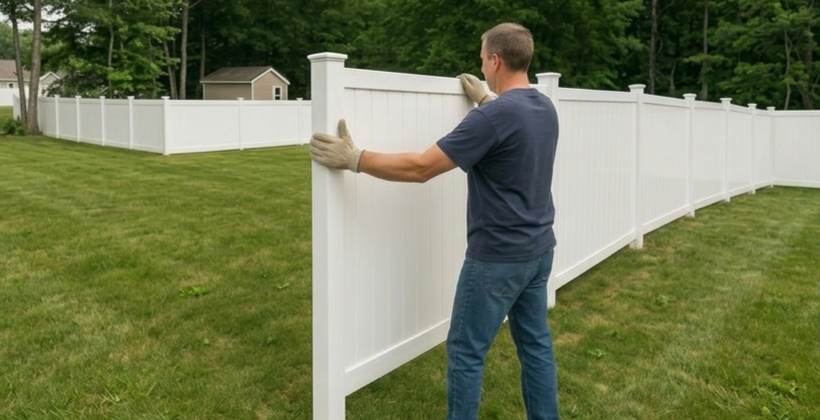
Attach the panels, cutting to fit where the run needs it.
Backfill, level and clean up.
Read all six before you start, because what you find in step two changes how deep you dig in step three.
Step 1. Marking the Fence Layout
Objective: Define your fence line clearly to ensure accurate panel alignment, gate placement, and post spacing. Before digging a single hole, you need to have a well-planned layout. Proper marking helps you avoid installation errors that can throw off the entire fence line.
Step-by-Step Instructions:
Start by identifying your property lines. Double-check with your plat map or property survey to ensure you’re not encroaching on a neighbor’s land.
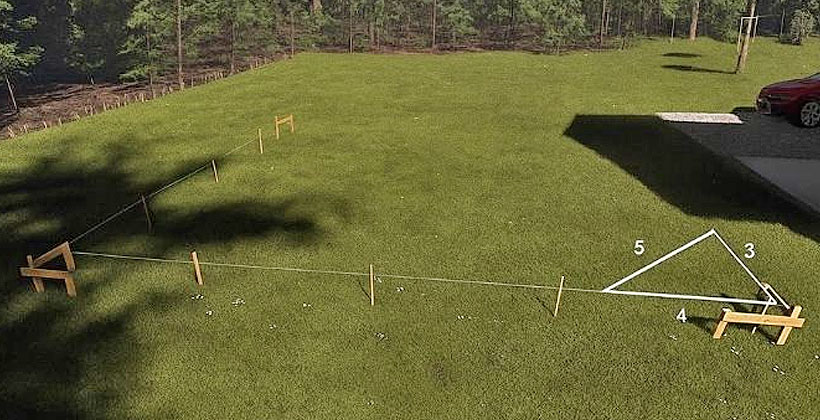
Mark the corners and gate openings first. Use wooden stakes or metal rebar at each corner post location and gate opening. These are your primary reference points.
Run string lines between the stakes. Pull the string tight between corner posts to create a guide for the fence line. Make sure the string stays taut and level, this helps keep your fence straight.
Use a tape measure to mark the location of each post. Measure according to your vinyl fence panel width (typically 6 or 8 feet). Mark each post position along the string line.
Check your corners for accuracy. Check your corners with the 3-4-5 method. Measure 3 feet along one side and 4 feet along the other. If the diagonal between those marks is 5 feet, the corner is square.
Mark each post hole precisely. Use spray paint or chalk to mark the center of each post hole. This ensures uniform hole spacing when you start digging.
Pro Tip: Lay out the entire fence line before digging any holes. This helps you visualize the layout and make adjustments before committing to post placement.
Step 2. Evaluate Ground Slope
Objective: Determine how terrain affects the placement of vinyl fence posts and the configuration of panels.
Understanding your landscape is crucial before installation. Uneven ground can significantly impact the appearance and performance of your fence over time. Taking the time to evaluate your slope now will save you significant headaches during the build.
Step-by-Step Instructions:
Stretch a string line along the planned fence run. Keep it tight between corner posts and about 6–12 inches above ground.
Use a line level or laser level to identify elevation changes along the string. This reveals how much slope you’re dealing with across each section of fence.
Walk the fence line and mark slope changes. Note where the ground rises or falls significantly between post locations.
Choose Your Slope Design Strategy:
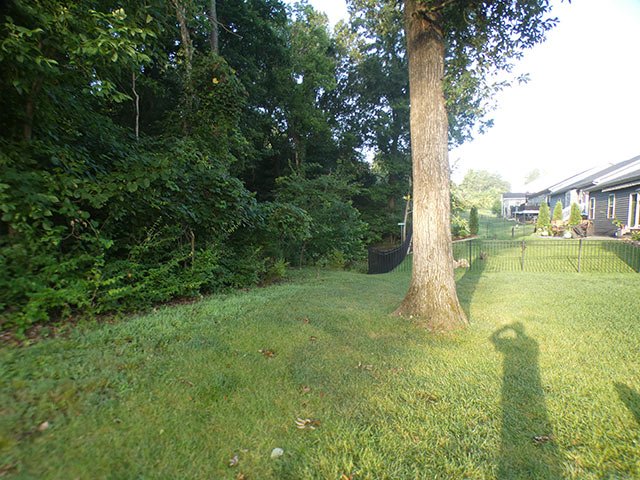
Stepped Fence Design: Ideal for steep slopes. In this approach, each vinyl panel remains level, and posts are installed at varying heights to create a stair-step effect. This is the most common option for traditional vinyl panels that aren’t designed to flex.
Racked Fence Design: Best for gentle slopes. Here, the vinyl panels follow the contour of the land. Posts remain vertical, but the panels angle slightly to match the terrain. Not all vinyl fences can be racked, so this requires special panels.
Important: Most standard vinyl fence panels are not racked by default. Check with your manufacturer or supplier (like Maintenance-Free Outdoor Solutions) to confirm whether your style allows for racking or requires stepping.
For steep grades: You may need taller fence posts and may even need to custom-trim panels to maintain visual consistency and stability.
Step 3. Dig Post Holes (With Adjustments for Slope & Gates)
Objective: Dig stable, well-positioned holes that accommodate vinyl post type, terrain variations, and climate conditions for a long-lasting fence.
The success of your installation largely depends on how well you dig and prep your post holes. Inadequate depth or poor drainage are among the top reasons vinyl fences shift or lean over time, especially in freeze-thaw climates like St. Louis.
Standard Guidelines for Digging Vinyl Fence Post Holes
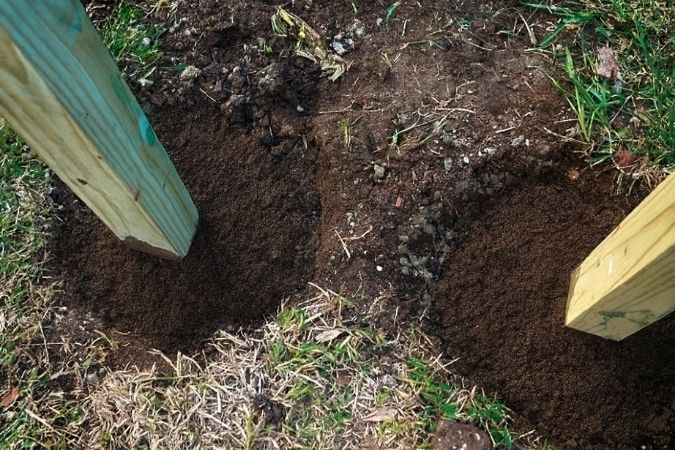
Depth: Post holes should be 30–36 inches deep, depending on the local frost line. In the St. Louis area, the average frost depth is approximately 30 inches.
Diameter: Line post holes: 8″–10″ wide and corner and end post holes: 10″–12″ wide for added strength
Spacing: Measure 6′ to 8′ center-to-center, depending on your vinyl fence panel size and manufacturer recommendations.
Drainage Layer: Add 3 to 6 inches of crushed gravel or stone at the bottom of each hole. It drains water away from the post and reduces frost heave, which is what keeps the post where you put it.
Adjusting Post Holes for Sloped Terrain
When installing a vinyl fence on uneven ground, the hole depth may need to be adjusted accordingly. Dig deeper holes on downhill runs so that the tops of all posts stay level along your string or laser line. Use a string line or laser level to guide height consistency across sloped areas. Whatever the slope, keep the bottom of every hole below the frost line. Some posts will need a deeper hole than the rest.
Pro Tip: On steep slopes, mark post tops in advance with painter’s tape to maintain a consistent visual line while setting posts.
Gate Post Installation: Stronger, Deeper, More Secure
Gate posts endure more force than any other part of your fence. Treat them like structural load-bearing supports.
Hole Depth: Minimum of 36″–42″ deep, or deeper for large/heavy gates
Diameter: 12″–14″ wide, and consider a bell-bottom shape to anchor against frost uplift and leverage
Reinforcement Options:
Steel pipe inserts or aluminum stiffeners inside vinyl gate posts
Add vertical rebar into the concrete for extra strength
Concrete Requirements:
Use high-strength or rapid-set concrete, avoid dry-packing (concrete must be thoroughly mixed)
Let cure for at least 48 hours before attaching gate hardware
Pro Tip: Always install gate posts first, then build the fence outward. This ensures precise gate spacing and alignment for hardware and function.
Step 4. Set Fence Posts & Pouring Concrete
Objective: Secure each vinyl post in place with proper alignment, spacing, and support to ensure long-term durability and performance.
Once your post holes are dug and gravel bases installed, it’s time to set your fence posts in concrete. Precision here is critical, mistakes in leveling or spacing will impact the entire vinyl fence installation.
Setting Vinyl Fence Posts
Place the post in the center of the hole: Use a level on two adjacent sides to ensure the post is perfectly plumb (vertically straight).
Align post height using your string line or laser level: Post tops should be consistent along the entire fence run. Use temporary bracing if necessary to keep the posts in place during the pouring process.
Confirm spacing between posts: Double-check your 6’–8′ center-to-center spacing per panel specs. Improper spacing can cause vinyl panels not to fit or result in excess stress on connectors.
Pouring Concrete for Vinyl Fence Posts
Mix concrete thoroughly: Use pre-mixed high-strength or fast-setting concrete for best results. Avoid dry-packing; concrete should be pourable and well-mixed.
Fill each hole to about 2 inches below ground level. This allows room to cover the top of the concrete with dirt or mulch for aesthetics and UV protection.
Slope the top of the concrete away from the post: This helps shed water and prevents pooling around the base.
Do NOT move the post once concrete is poured: Hold it steady (or brace) until the concrete sets. Misalignment after pouring can affect your entire fence line.
Let the concrete cure fully.
Standard concrete: allow 24–48 hours
Rapid-set concrete: allow at least 1–2 hours before light handling (follow package instructions)
Gate Post Reminder: As mentioned earlier, gate posts require deeper holes and stronger reinforcement. Always double-check alignment before the concrete sets, gate performance depends on it.
Pro Tip: Only install one or two posts at a time. Pour and level each before moving to the next. This ensures precision and avoids compounding errors.
Step 5. Attach Fence Panels
Objective: Secure vinyl fence panels between posts with proper alignment, structural integrity, and a clean, professional look.
Once your posts are fully set and cured, it’s time to connect your fence line. Panel installation can vary slightly by product, so always refer to the manufacturer’s instructions, but these general guidelines apply to most vinyl fencing systems.
Standard Vinyl Fence Panel Installation
Insert panels into routed post holes or attach them with mounting brackets, depending on your fence design. Routed posts allow the panel rails to slide directly into the post. Bracketed systems require attaching the rails to the outside of the post using clips or brackets.
Use a level or string line to ensure each panel stays consistently level and aligned with the rest of the fence.
Check fit before fastening. Make sure panels are seated fully and evenly inside the posts or brackets before securing, especially on sloped terrain where one side may settle differently.
Fasten securely with rust-resistant screws. Use manufacturer-approved stainless steel fasteners to avoid corrosion over time. Avoid overtightening, which can crack vinyl.
Pro Tip: Work one panel at a time, checking spacing and level as you go. This helps catch misalignments early before they affect multiple sections.
Step 5b. Cut Vinyl Fence Panels to Fit (If Necessary)
Objective: Achieve a clean, safe, and professional finish when custom trimming panels for shorter sections, slopes, or obstacles.
Vinyl fence panels often require trimming at end runs, near buildings, or around unique features. Cutting correctly ensures both structural stability and curb appeal.
How to Cut Vinyl Fence Panels:
Measure carefully. Measure the exact space between posts and subtract any necessary overlap (e.g., the depth of rails that fit into posts or brackets). Measure twice, cut once.
Choose the right tools:
Use a circular saw with a fine-tooth carbide blade or a power miter saw for straight, clean cuts.
Use a jigsaw with a fine-toothed blade for notching around obstacles, such as tree roots, rocks, or retaining walls.
Smooth the edges. After cutting, deburr with a file or sandpaper to remove sharp vinyl fragments and ensure a clean, finished look.
Work on a stable surface. Set up a flat cutting area with clamps if necessary to secure panels during cutting.
Use proper PPE. Always wear eye and ear protection when cutting, especially with power tools and synthetic materials like vinyl.
Pro Tips:
Shorten panels from both ends to maintain symmetrical picket spacing when trimming full-length sections. This keeps the appearance balanced.
Save your off-cuts. They’re perfect for:
Test fitting brackets or rail angles
Checking post spacing before final assembly
Practicing cuts on slopes or unusual obstacles
Step 6. Final Adjustments and Cleanup
Objective: Ensure a polished, level, and secure finished fence, and leave your yard looking better than before.
You’re in the home stretch! Before calling the job done, it’s essential to inspect your entire installation and identify any minor issues thoroughly. Making small adjustments now can prevent long-term problems and enhance curb appeal.
Post-Installation Inspection
Walk the entire fence line. Check for loose brackets or screws, panel gaps, or misaligned rails.
Confirm that all posts are still level and that panels haven’t shifted during installation or curing.
Trim post tops (if needed). If any posts are taller than necessary, trim them to a uniform height before adding caps.
Use a fine-tooth saw and ensure clean, straight cuts.
Install decorative post caps. Most vinyl fence post caps either snap into place or secure with adhesive.
Choose styles that match your fence design, flat, gothic, solar-lit, or New England-style options are popular.
Backfill and Soil Compaction
Re-fill around each post base with soil (or gravel in erosion-prone areas).
Use a tamper or the end of a 2×4 to compact the soil firmly around posts.
This helps stabilize the fence and prevents it from shifting, especially on slopes or after rainfall.
Pro Tip: Slightly mound soil around each post to direct water runoff away from the base, a small detail that protects against pooling and frost heave.
Cleanup and Waste Removal
Clean up all tools, packaging, and debris. Properly dispose of excess concrete, plastic wrap, brackets, or unused off-cuts.
Sweep or blow off walkways and lawn to restore a neat jobsite.
Optional: Hose off panels to remove dust or scuff marks from handling. Vinyl is low-maintenance, but a quick rinse makes everything look brand new.
Six Vinyl Fences We Installed, and What Each One Took
Every one has its own page with before and after photographs, the footage and the number of days.
Sumner, Barnhart – 5 June 2026. 531 linear feet of white vinyl split rail, 4 gates, 5 days. The old fence had chicken wire attached the whole way, and pulling it took most of the first day. Coronado 3-rail style.
Emht, Imperial – 29 July 2026. 160 linear feet of white vinyl spaced picket fence for pet containment, 2 days. We laid the line out with the homeowner on day one and missed the neighbor’s sprinkler line.
Weis, Fenton – 13 August 2026. 131 linear feet of white vinyl picket fence on a corner lot with a sloped double drive gate, 2 days. The homeowner showed us where two large trees had just come out, and we found roots in the digging path where they had stood.
Bryant, Wildwood – 31 August 2026. 104 linear feet of 6-foot Supreme white vinyl privacy fence, replacing a 4-foot fence that gave no privacy once a pool went in, 2 days. We found the marked utilities far enough off the line that we did not have to hand dig.
Harvengt, Collinsville – 1 May 2026. 84 linear feet of Artic Blend woodgrain vinyl privacy fence around a patio, 1 day. Separate sections kept the patio private without closing off the yard.
Rogers, St. Louis – 25 June 2026. 61 linear feet of 6-foot white vinyl privacy fence, 2 gates, 2 days. The city hole inspection passed, and the old wood fence came out without damaging the landscaping.
Look at the range before you plan your weekend. 61 feet took two days and 531 feet took five, because removal, gates and slope drive the schedule more than footage does. We took two days on 104 feet, and we do this every day. Budget accordingly if it is your first fence.
Doing It Yourself, or Having It Done
If you are installing it yourself, we sell the panels, posts, gate hardware and concrete over the counter. The supply store is open to the public. The staff will check your post count and spacing before you load up. That check is free and takes ten minutes.
Where this guide stops. It covers flat to gently sloped yards with standard panels. It does not cover a fence on a retaining wall, a run inside a drainage easement, or anything needing engineered footings. Ask your building department about those, and ask us. Vinyl panels will not carry a gate: the gate posts carry that load, which is why they go deeper and wider than line posts.
Three situations mean the job is not for you: You cannot get 30 inches down by hand or with a rented auger. Your fence line runs along a main road or a sidewalk, where the city has to approve the height. Or your subdivision approves the style first. On the Wildwood job above, the height change needed city approval before anything was ordered. Any of those three stretches a weekend into a month.
When we do the install, the labor is guaranteed for a year, on top of the manufacturer’s warranty on the vinyl. We can usually get out to see your yard within 1 to 4 days. To see the panels and gates before you buy, visit our showroom in Arnold.
That visit looks like this: we measure your line and bring a real panel out so you can see the style in person before deciding. You walk the layout with us, and nothing gets dug until you sign off on it. Most yards take 1 to 3 days.Read what homeowners say about their fences.
Either way, get the post depth right. It is the one step that cannot be corrected later without pulling the fence back out.
Vinyl Fence Installation FAQs
How deep should fence posts be?
30 to 36 inches in the St. Louis area, set in concrete over a 3 to 6 inch gravel base. The figure follows your local frost line, which averages about 30 inches here. Gate posts go deeper and wider than line posts because they carry a swinging load.
How far apart do vinyl fence posts go?
6 to 8 feet on center, measured post centre to post centre, depending on the panel size your manufacturer supplies. Measure the panel before you dig, not after.
How many days does a vinyl fence take?
Budget 2 to 5 days doing it yourself. We took 1 day on an 84-foot run and 5 days on 531 feet that included tearing out the old fence. Removal, gates and slope drive the schedule more than footage does.
Do I need a permit to install a vinyl fence?
Permits are set by your municipality, not by the state, and they differ across the St. Louis area. Ask your building department before you dig. Call 811 first either way, which is free and required.
Before You Start Digging
A vinyl fence is a weekend-and-a-half job when the holes are right. Mark the line. Check the slope. Dig to 30 inches. Set the posts in concrete over gravel. Everything after that is panels, and the panels we set are Catalyst, made by Barrette Outdoor Living. We are listed on their installer directory.
Dogs were meant to run free — but whether you live in the suburbs, the city or the secluded countryside, keeping your pets safe with reliable fencing is an important concern. We’ve been installing dog-friendly fences in the greater St. Louis area for 20+ years. Read More
Steel wins on strength, aluminum wins on upkeep and cost. Expect $20 to $45 a foot installed for aluminum in the St. Louis area, with steel usually running 15 to 25% higher for the same height and style. Steel is heavier and welded rather than bolted together, so it takes more force to bend or breach. Aluminum will never rust. Neither one needs paint, and both clear most HOA rules that reject chain link.
We install both, so you get the real trade-off here, not a push toward whichever one we’d rather sell. Check our aluminum fence installation page or our steel fence installation page for what each job involves. Or dial 636-464-1144 for a no-charge price on your yard.
Strength and Security
Aluminum fence sections are built from separate rails, pickets and brackets joined together. Steel sections are welded as one piece. That is why steel takes more force to bend, pry or break through than aluminum of the same style.
Home-grade aluminum rails usually hold up to about 350 lbs of pressure before they give. The steel we install most is Ameristar’s Montage line, built from galvanized steel with a welded frame. Builders reach for it on business and high-security jobs where aluminum would not pass review.
If security is your deciding factor, steel is the stronger choice. If your fence is decorative or for pet containment, aluminum holds up fine for nearly every yard. Steel matters most when you need to stop a determined intruder, not just keep the dog in.
Rust, Finish and How Long Each One Lasts
Aluminum does not rust. It contains no iron, so it cannot oxidize the way steel does. The powder-coat finish is cured on at the plant before the fence ever ships, not touched up on site.
Steel can rust if the coating is ever breached. Ameristar’s Montage line ships with an E-coat, maintenance-free finish over recycled galvanized steel to stop exactly that. Montage II, the heavy-duty version, carries a 20-year warranty from Ameristar. Montage’s home steel fencing carries a lifetime limited warranty from Ameristar, the same tier of backing as Elite’s aluminum.
In practice, both materials outlast the person who bought them when the coating stays intact. You only see a real gap if the coating gets cut through to bare metal for years. That is rare on a home fence. Nobody is grinding on it.
Style and Color Options
Aluminum comes in a wider color range. Elite, the aluminum we install most, ships in seven standard colors plus custom options. That makes it the easier match for an existing house color or an HOA palette.
Steel usually comes in fewer standard colors, most often black or bronze. The finish has to hold up to the E-coat process. If you want your fence to disappear into the yard, black works on both. Need one accent color to match your trim or brick? Aluminum gives you more room to get it right.
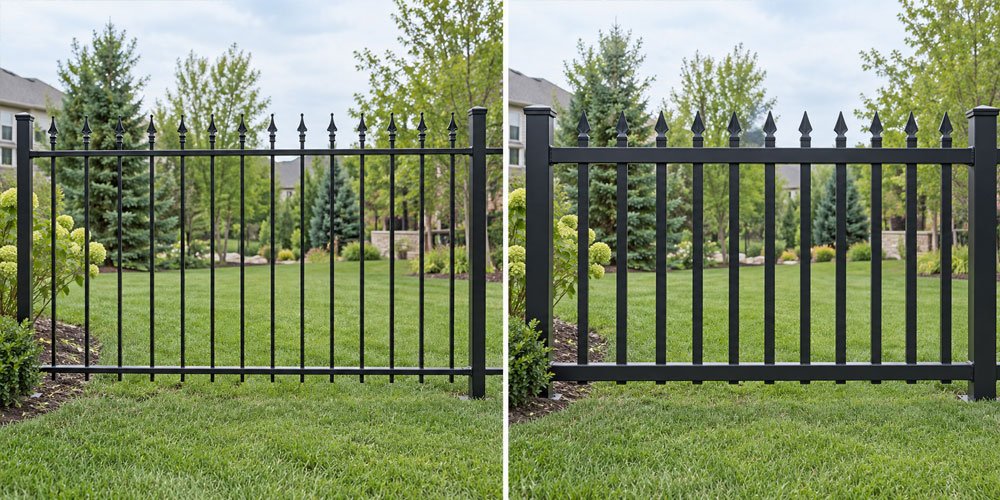
Both materials come in picket, flat-top, arched and finial-topped styles, so style alone rarely settles the decision between them.
BeforeAfter
On the Criscione job in Eureka, we found the yard sloped enough that a rigid steel panel would have left gaps under the rails at the low end. Aluminum’s raked panels stepped down the grade instead, so the fence line followed the hill rather than fighting it.
Cost
Aluminum sits in the $20 to $45 a foot range for most St. Louis yards, with $25 to $40 covering the majority of jobs. Our aluminum fence cost page breaks that down further by height and gate count.
Steel costs more than aluminum for the same style and height. A welded frame takes more labor and material to build than a bolted-together aluminum section. The gap is real, but it is not huge on a normal home job. Budget roughly 15 to 25% more for steel than aluminum at the same height and style.
Neither material adds an ongoing maintenance cost the way wood does. The extra you pay for steel up front buys strength, not lower lifetime cost.
What We’ve Actually Installed
The three aluminum case studies below are real, dated jobs from 2026. We do not have a published steel case study on this site yet. The strength and warranty numbers above come from Ameristar’s own published specs, not from one of our own installs. Steel installs happen here too, just not written up yet. Ask us for photos when you call if a specific steel job matters to your decision.
Voegtli, Kirkwood MO, 15 May 2026. 38 linear feet of aluminum picket, 4 feet tall, matte black, 2 gates, 1 day. Picket gaps closed to 1 and 5/8 inches to contain two small dogs.
Criscione, Eureka MO. Matte black Elite aluminum, approved by the subdivision on the first submission.
Schwyhart, St. Louis, 21 August 2026. 260 linear feet of black aluminum picket, 6 feet tall, 4 gates, 3 days. Height set to keep deer out of the flower beds.
Frequently Asked Questions
Which is better, a steel fence or an aluminum fence?
Steel is stronger and better for security or high-impact areas. Aluminum costs less, comes in more colors, and needs zero maintenance either way. Is your yard a normal home yard where nobody is trying to force their way in? Then aluminum is the better value for you. Steel is not for you if all you need is a decorative line around a flower bed or a low-traffic side yard – you would be paying for strength you will never use. Steel earns its extra cost on a business site or a pool fence with a strict code. It also earns it anywhere security is the real goal.
What are the downsides of aluminum fences?
Aluminum is softer than steel, so it takes less force to bend a picket or rail out of shape. It costs more up front than chain link. Standard picket spacing will not hold back a determined cat or a small, thin-bodied dog breed, so order it tighter up front if that matters for your yard.
What are the downsides of steel fencing?
Steel costs more than aluminum for the same style and height. It is heavier too, which can mean more labor if your site is difficult to dig. If the protective coating is ever cut through to bare metal and left unrepaired, that spot can rust.
Do aluminum fences increase property value?
Yes, aluminum fences tend to help rather than hurt. A buyer sees a rust-free, no-maintenance fence as one less thing to budget for. An aging wood or chain link fence reads the opposite way to that same buyer.
How much does a 100 foot aluminum fence cost?
At $25 to $40 a foot installed, 100 feet of aluminum runs roughly $2,500 to $4,000, before gates. Gates are priced separately based on width and hardware.
Which fence requires the least maintenance?
Aluminum and steel are close to tied here. Both need an occasional rinse and nothing else under normal conditions. Aluminum has a slight edge only because there is no coating to ever worry about being breached.
Getting a Price for Your Yard
We handle both materials, wherever your property sits in the St. Louis region, and we are a listed installer on the Catalyst installer directory. Your finished install carries one year of our own workmanship backing on top of whatever the manufacturer promises.
Getting a firm number takes three steps:
You call or request an estimate online.
We measure your yard, usually within 1 to 4 days.
You get a written price for aluminum, steel, or both, so you can compare them side by side before deciding.
Our Arnold showroom keeps samples of both materials if you want to see and touch them before committing. You can also read what past customers say about the crew on our reviews page.
Ready for a number? Dial 636-464-1144. There is no charge for the visit or the quote.
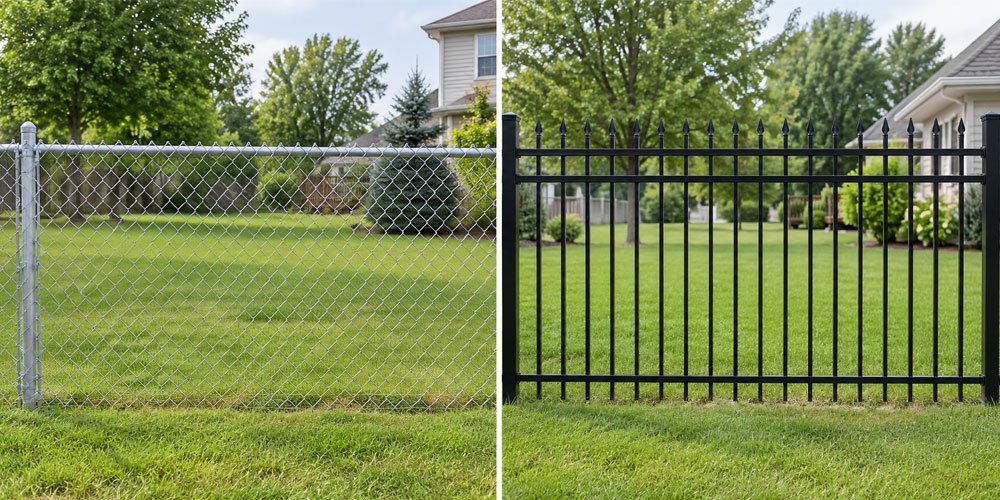
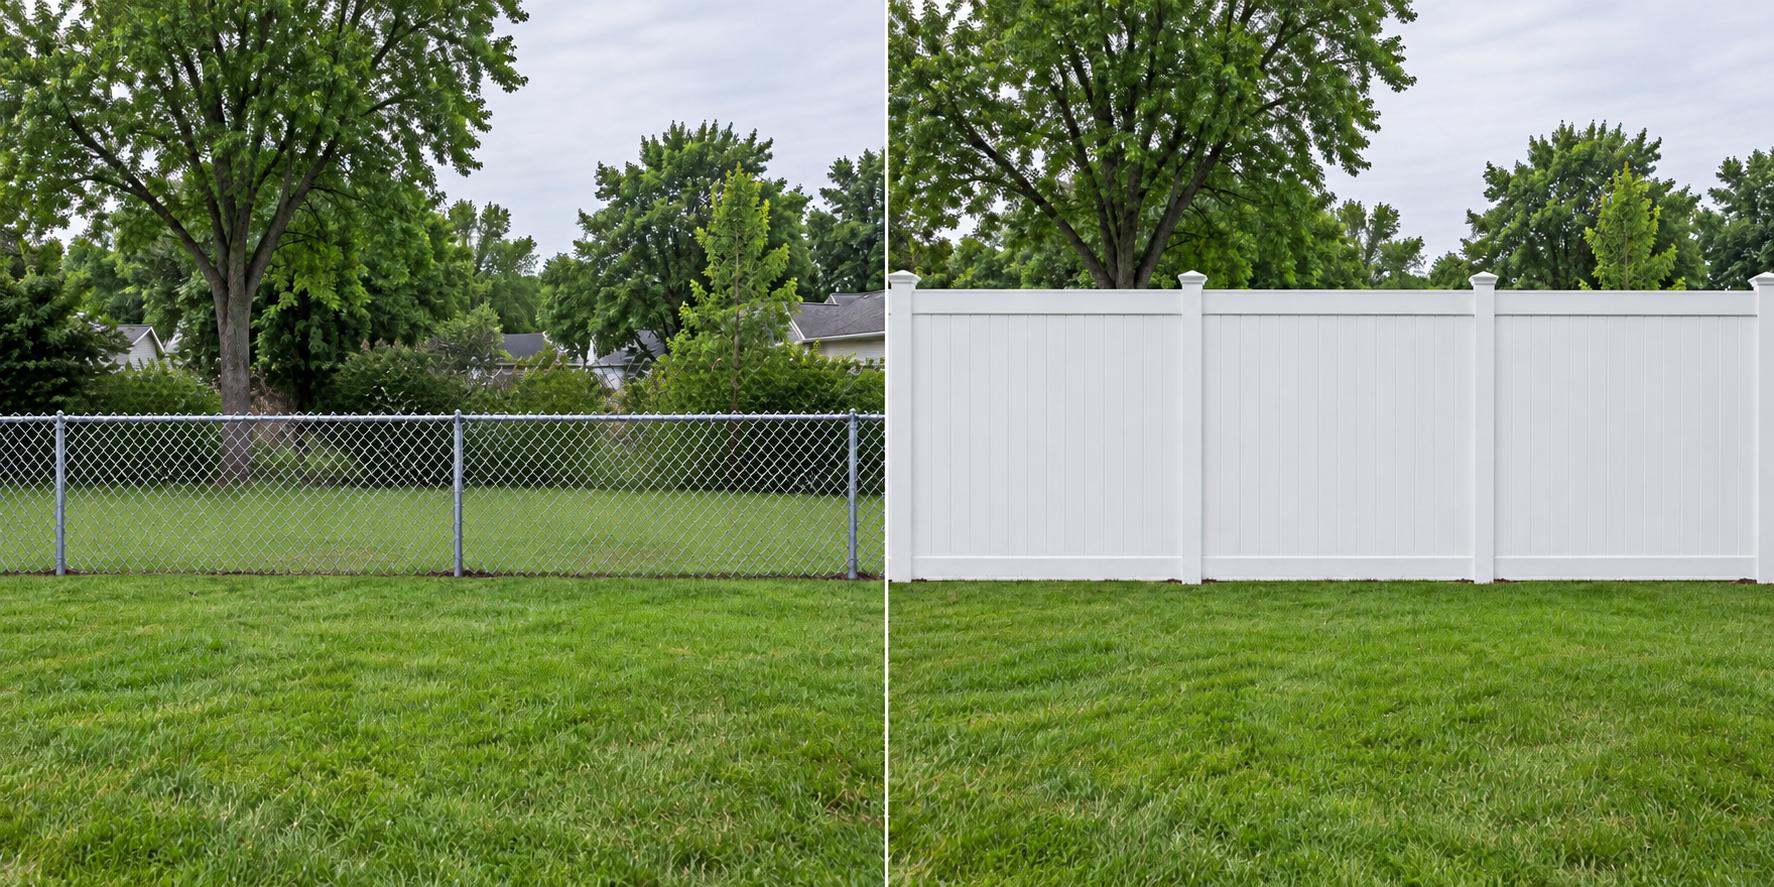
Chain link costs less than vinyl to install, and vinyl gives you privacy that chain link cannot. HomeGuide puts chain link at $10 to $40 per linear foot installed, and our St. Louis vinyl cost guide puts vinyl at $45 to $75.
Maintenance-Free Outdoor Solutions installs vinyl and does not install chain link, so we can price only one side of this choice. We will still tell you where chain link wins.